9 House Painting Ideas For Frequently Asked House Painting Questions:
Just Add Paint, Painters in Camp Hill, PA have ANSWERS!
Frequently Asked Painting Question 1:
How does Climate Control affect the Painting Process?
Climate Control can have a huge impact on the painting process. As we apply paint to walls in home, we add moisture to the air. Especially on large jobs, (3 rooms or more,) this moisture can become excessive. When humidity in the air becomes too high, several negative things begin to happen to the paint. First, the paint will dry more slowly, adding additional cure time. We try to avoid this because it slows down the overall process, and because we HATE waiting for paint to dry. Second, paint applied with too much humidity can tend to set up a texture similar to “orange peel” on the wall. This takes place when the paint beads up before beginning to dry. Both of these difficulties can negatively affect job outcomes. Fortunately, the solution is simple. Use of Air Conditioning or Heating, (depending on season and conditions,) helps remove moisture from the air. As long as we have access to these systems, we can provide a fast, quality paint job- regardless of conditions. You may also notice that we bring several large fans and heaters with us when we come to paint. These tools supplement your regular heating and cooling system, and are generally used to dry areas of spackle or caulk that need particular attention in order to dry in a timely manner.
Frequently Asked Painting Question 2:
How does Furniture in the room affect the Painting Process?
Furniture has a surprisingly large effect on the painting process. When we do bids for a job, they are always lower if furniture is not present. (Or if the client has a small amount of furniture that can easily be slid out of the way for painting.) That is why our BEST situations for painting are either just before someone moves into a house, or just after they move out. There are several ways furnishings affect painting. First, painting is most efficient when done with a 6 foot or longer paint pole. When a room is filled with furniture, we are often unable to use a long pole. (In some cases, we even have to paint with just a roller on the cage itself.) We therefore lose leverage, and also must paint in shorter strokes. This adds both a great deal of time to the process, and causes a slight reduction in overall job quality, because being able to roll quickly from ceiling to floor on the final pass gives the best, most even coverage possible. For this reason, we suggest that a plan be put in place before we arrive, to determine how furniture will be handled. Our best system for painting in a currently occupied house is to use furniture sliders to remove items from the rooms we are working in. Even though moving furniture takes time, it saves MUCH MORE time than painting around it. In actual timed tests, we have found that we see a 30-50% increase in time to paint small rooms with large amounts of furniture. (This is especially true in small bedrooms, where a bed and several dressers may be present at once.)
Frequently Asked Painting Question 3:
How do I fix roller texture, light dents, and pinholes in a Wall?
It is AMAZING what a difference a little bit of wall preparation, before painting, can have on producing a high quality final product. You do NOT have to be an expert drywall professional to make an older wall look much newer again. For homeowners creating a do it yourself paint job, the most important factors will usually be removing old roller lint and texture from the wall by sanding, then fixing light dents and pinholes with a quality spackle paste. We suggest using a screw on drywall sander or Full Circle Radius 360 disc sander with a medium grit paper in order to pole sand the wall first, then using spackle to fix small dents and pin holes. We have been using Sherwin Williams spackle PASTE because it is truly nearly shrink free, and because it can be wet sanded as well as dry sanded when used over small areas of damage. We prefer to wet sand because it greatly reduces the amount of dust that goes into the air. When combined with a small, (3 or 4 inch,) spackle knife, small dents can be filled totally flat, then recoated with another nearly flat coat after coat one dries. (This will be VERY fast with this spackle paste, which often dries in a matter of minutes!) A light sanding with fine grit sanding block will provide a perfectly smooth result, and a quick follow up wet wipe down will remove any extra dust from the wall. For the nail holes, simply press a tiny bit of spackle into the hole with your fingertip. A light wet wipe with a rag after it dries, and you should be good to go!!
Frequently Asked Painting Question 4:
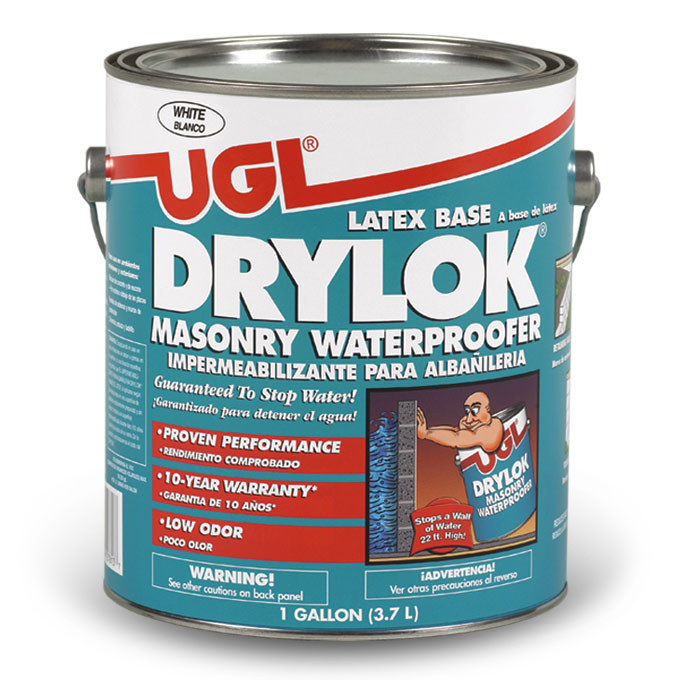
What do I use to paint a Cinderblock Basement?
If you are talking about painting over BARE cinderblock, and are looking for water resistance, we exclusively use Drylok sealer. It is an extremely heavy, gritty product. You will need to prep the surface by cleaning it as well as possible with a metal wire brush, and make sure that the wall is perfectly dry before applying the sealer. We suggest a very thick, (1 inch or more,) roller cover, so that you may press the material into the cracks on the cinderblock, filling it completely. Water resistance only happens if all the little areas are completely filled in. (We always do 2 coats to ensure this happens.) Please expect a great deal of paint spritz with this product / roller combination, and use butcher block paper to completely cover the surrounding floor. This product dries rock hard, so we never suggest using a drop cloth or any other re-usable floor covering.
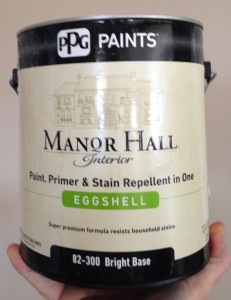
If your cinderblock walls have been painted or primed before, we suggest Valspar Duramax paint for a final coat. (Always prep walls by removing any old, flaked paint with a wire brush.) Drama is an exterior paint that provides an extremely thick finishing coat, with excellent stretch, which provides superior crack and mildew resistance over time. It is also super durable, and can be wiped down or cleaned with no damage to the paint. Again, we recommend 2 coats to absolutely guarantee that all cracks and holes in the stone are filled in.
Please be aware that when using either of these products, that an organic vapor respirator should be used, and any downstairs / indoor areas should be vented as much as possible. These are strong, industrial level paint products, and produce strong fumes. (Though both are still latex based, so are at least easy to clean up!!). Painting cinder block is one of our FAVORITE house painting ideas – and it will certainly add value to your home.
Frequently Asked Painting Question 5:
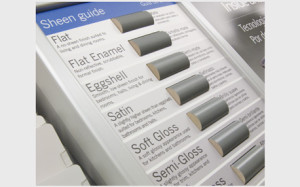
What Paint should I use for my Bathroom?
This is a rare, beautiful moment where a question has a very simple answer! We recommend using and eggshell sheen or HIGHER for bathroom painting applications, and in fact sometimes use semi-gloss- especially for ceilings above showers. The bottom line is that moisture is the enemy of paint. It is always safest to use a higher sheen paint when water will be condensing on a wall or ceiling, as it will after a warm bath or shower. This is particularly important when ventilation is poor. Using this type of paint provides two benefits. 1st, the sheen causes the water to bead on the surface and dry, rather than soaking into the wall, as is possible with lower / no sheen paints. 2nd, paints with higher sheen can be wiped and cleaned with mild cleaning solutions, which will further take away the possibility of mildew forming. As a final guarantee, we suggest adding a mildew-cide to the paint, or using a paint with this built in, when painting in bathrooms or laundry rooms or other high humidity environments.
Frequently Asked Painting Question 6:
When can I re-hang photos / artwork after painting?
We ask that clients wait at least 48 hours before re-hanging paintings and photos on newly painted walls. In conditions of high humidity,72 hours can be an even safer bet! While the walls will feel dry to the touch much sooner, photos and wall-hangings apply angular pressure to the wall. Paint that feels dry to the touch will often still be sticky enough to be damaged by this type of pressure. While it is exciting to re-decorate the finished wall, it is better to wait a little longer and make sure the wall STAYS beautiful!
Frequently Asked Painting Question7:
How do I keep Doors and Windows from Sticking after they are painted?
This is a question we are commonly asked. It comes up most often nowadays because security is much more of a concern than it used to be, and most customers prefer to have doors and windows closed / locked as soon as possible. Our suggestions for dealing with this, until recently, had been that doors and windows should be left at least cracked for 48 hours, to prevent the paint from sticking and tearing. After talking with customers about their concerns with leaving windows and doors open, we found a solution that often works to allow items to be closed much sooner. First, paint must be allowed to dry to the touch completely, and to where it is no longer “sticky.” (This usually takes between 1.5 and 3 hours.) We have found that placing a small amount of baby powder along the edges where doors and windows contact the frame, will often prevent sticking- even if they are closed tightly. Again, it is still safest to allow the paint to cure before closing the door or window, but if this isn’t possible, the baby powder trick works very well for us!
Frequently Asked Painting Question 8:
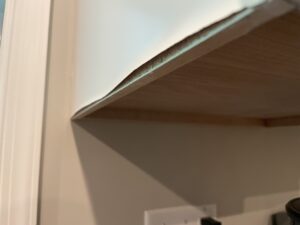
How do I repair thinly cracked corners, ceilings, and walls?
We have found that use of an elastomeric caulk is the best, cleanest, and simplest way to repair corners that have cracked out over time. As houses shift, and as seasons change, cracks often appear in corners, ceilings, and even the middle of walls. While many people use spackle to fix these types of cracks before painting, we have found that places which crack once will almost ALWAYS crack out again, usually in a short period of time. We have been sealing corner, wall, and ceiling cracks with elastomeric caulk, (Sherwin Williams Maxflex is a good example,) and have found that applying several layers to the crack, then wiping smooth with a wet cloth after each coat, will provide a fix that will STRETCH with house shifts and temperature changes, rather than just cracking out again. This provides a much more attractive, longer term fix, and is a cleaner solution that spackling and sanding!!
Frequently Asked Painting Question 9:
When can I vacuum along baseboard after painting?
When Just Add Paint does the work for you, we always vacuum at the end of the job, and use special tools that will keep the baseboard from being damaged. When you do your own painting, however, you must be very careful to avoid running a vacuum along the baseboard for AT LEAST 48 hours, and 72 hours is even better. While paint may feel dry to the touch, many paints can actually take up to a week to fully cure. It is important to make sure that you give the paint surface time to dry properly before applying pressure to it / banging it with a vacuum attachment. Even though paint appears to be dry, with rubber surround on vacuum attachments can easily rub off or discolor fresh paint. Please play it safe and give it time to dry!!
We hope you have enjoyed our article addressing the house painting ideas. Just Add Paint, painters in Camp Hill, PA, do our best to answer all your painting questions. If you have any house painting questions that were not answered in the article, please contact us on our website www.justaddpaint.net , or through our Facebook page www.facebook.com/justaddpaint . Please stop by and say hi while you are there!


