About 75% of the calls we get to paint kitchen cabinets are for oak. It is a challenging enough process that our competitors tend to shy away from. They tell customers it can’t be done, it looks bad, or it is less expensive to replace the doors. Worse yet, they charge extra for “grain fill,” which can crack out with door movement over the years. And fixing painted doors with cracked-out filler actually DOES cost more than replacing the doors. So what are the challenges of painting oak kitchen cabinets? And what is the process for doing it correctly?
Oak has a handful of challenges unique to this type of wood. These include:
-
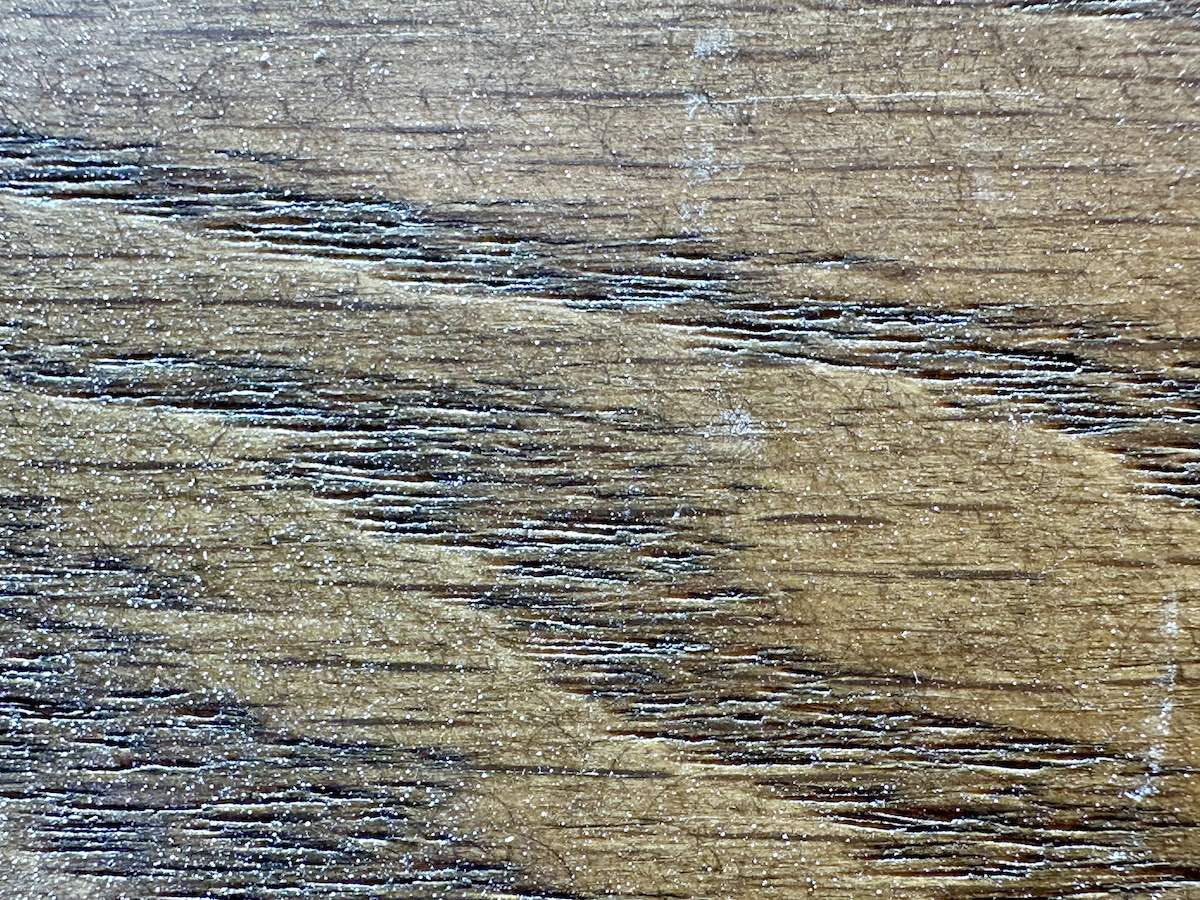
- Oak Is Highly Porous – Compared to other wood commonly used for kitchen cabinets, Oak has A LOT of texture and deep pores. Enough so that it is extremely difficult to seal the wood using only a sprayer. Homeowners will often resort to brushing and rolling primer and paint into the wood to get it to seal. However, this leaves brush and roller texture on the oak. The process of sealing the wood and allowing the natural texture to telegraph through is a delicate one that starts with prep and requires maintenance all the way through the final coat.
-
- Tannin And Dye Migration are Difficult To Stop – Because of the deep pores described above, tannin bleed and dye migration are hard to control. These can usually be controlled with the correct primer. But professional technique is more critical with oak cabinets.
-
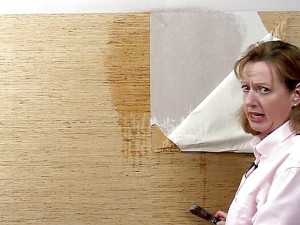
- Preparing Oak Is Tedious – Most contractors (besides Rich Wise) will tell you that cleaning and prepping cabinet doors for paint is the worst part. But oak doors truly are the worst of the worst! Even pros like us often lose an entire day or more to this (and that is with state-or-the-art tools). Doors often require several cleanings with de-greaser, and an abrasive may be required to remove stubborn grease. Not to mention the challenge of removing polish or wax from a porous surface. Solvent-based cleaners must be used in addition to standard de-greasing.
-
- Primers And Paint Require Additional Dry Time – More texture/pores mean thicker coats of primer and paint, which can (and does) add days to the project.
-
- Oak Cabinet Doors Tend To Move – Why mention door movement? Because moving doors can mean cracking paint if the wrong product choice is made. Products that dry extremely hard but also have some flexibility to them work best. Aside from durability issues, this is a top reason that over-the-counter/box store-type products fail on cabinetry.
How To Paint Oak Cabinets Like A Pro
-
- Don’t try this at home – There are countless Pinterest and Facebook groups out there encouraging doing your own cabinet makeover. “It will be easy,” they said. It WON’T be easy. I’m not saying don’t try it yourself. I am suggesting not to try it yourself if you have a high standard/are seeking painted cabinets that look like they came from the factory. There are too many things that can go wrong, especially with oak. Even identifying and locating the correct products for success can be a challenge.
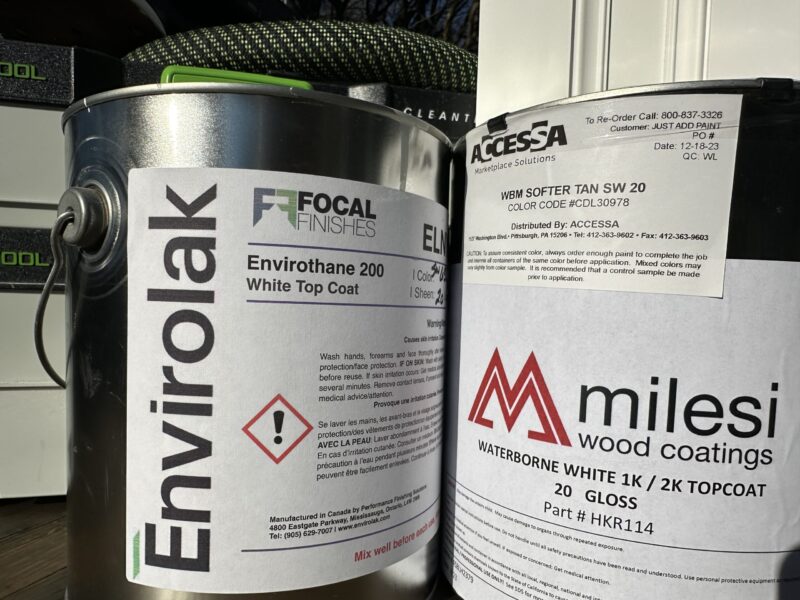
Milesi and Envirolak products have been tested and meet the requirements for the KCMA Standard. They both work great for painting oak cabinets.
- Don’t try this at home – There are countless Pinterest and Facebook groups out there encouraging doing your own cabinet makeover. “It will be easy,” they said. It WON’T be easy. I’m not saying don’t try it yourself. I am suggesting not to try it yourself if you have a high standard/are seeking painted cabinets that look like they came from the factory. There are too many things that can go wrong, especially with oak. Even identifying and locating the correct products for success can be a challenge.
-
- Identify And Locate The Correct Products – Contrary to popular opinion, a high-solids, water-based primer is the best choice. We have found the two that work best are Envirolak 170EPLR and Centurion CW1107. Both of these products are special order, and around $100/gallon. BUT, they have all the qualities one needs to be set up for success with painting oak cabinets. They are thick and heavy-bodied, have great adhesion, dry quickly, and sand easily. They also do an excellent job of blocking tannins, and an even better job of blocking dye migration. This is a 2-3 coat process with oak when spraying. Most sets require 1 1/2 – 2 gallons of primer to complete when spraying heavy coats.
-
- What Is Wrong With Solvent-Based Products – There are lots of recommendations floating around online for shellac-based primer and vinyl sealer (lacquer). These products have their place for spot-priming and specific problem-solving applications. However, they are highly flammable, brittle, and don’t do well with moisture or wood movement. We avoid using these products. They are typically used to save cost and time during production since they are cheap and dry VERY quickly. However, it is not worth the time saved with the quality compromise. Most commonly, chipping can occur around edges and wood joints. And yes, we learned this lesson the hard way.
-
- Clean Like A Professional – Plan on using lots of elbow grease. We recommend using Krud Kutter Original Formula, or their TSP-substitute product. This often requires several passes. Don’t neglect the sides – angled cuts in the wood have the deepest valleys and are often filled with food/grease. A green scrub pad or a 3×4″ non-woven pad from Surf Prep on a sander can work wonders. Remember to make sure the wood has had a chance to dry out after cleaning. If you don’t have a moisture meter, allow doors to sit overnight with a fan on them. Krud Kutter is environmentally friendly, but we still recommend gloves when handling it.
-
- Fix Imperfections – Fixing imperfections on oak cabinet doors requires a process different from that of other woods. Because of the wood peaks and valleys in the wood, smooth spots (from filler) can stand out as much as dings when light is reflected off the door. When filling dings and small scratches on oak, use as little filler as possible. Do not spread it over a larger area than absolutely necessary to cover the affected area. And do NOT caulk the gap around the 5-panel door where the rails and stiles meet the panel. This area is meant to be kept open to allow for the expansion and contraction of the wood. Our most commonly used fillers in the shop are bondo and single-component wood filler.
-
- Sanding Is Critical – For starters, there is no such thing as “no-sand” paint or primer. Well, it exists, but it is a marketing trick, and these products suck. Always sand every surface for optimal adhesion. Sanding the oak down through the sealer will provide a better surface for priming, and may also reduce peaks and valleys in the oak. Vacuum and tack cloth (low-tack preferred so we don’t leave residue on the wood) when sanding is completed. Typically, 120 grit is used to start in our shop. A respirator or, at the very least, a dust mask is recommended when standing.
-
- Solvent-Based Wipe – This is a final step after sanding and before painting. It is necessary in case any stubborn grease remains, and also to break up wax if polish was ever used for cleaning. Naphtha is ideal for this. In some cases, older lacquer or conversion varnish sealers may be failing completely. In this case, acetone may be used to help remove that existing coating. However, in most cases, naphtha is a sufficient solvent for a final wipe. PPE safety equipment is recommended when using solvents. Remember, solvents can enter your bloodstream through the skin and eyes, as well as your lungs.
-
- Prime Wood To Seal It – Oak will require a minimum of 2 and, more often, 3 coats of primer for a proper seal. Getting the primer thick enough and evenly distributed takes quite a bit of practice. The wood needs to be completely sealed, without bridging gaps on the 5-panel door. A dental tool or small pick can be helpful for fixing any gaps that may accidentally be painted with primer. Some DIYers and painters will use a brush and roller to “force” paint into the pores to fill them. Just beware that the topcoat will amplify any brush and roller texture, so it must be sanded out completely. When trying for a smooth finish, more sanding is better than less. Typically priming is used to build “up” a surface, but with oak, the process is different. The futher down the primer is sanded, the better the additional coats are able to seal the oak. We prime 5-6 wet mils, which will be tough to achieve without drips if you don’t have years of practice. If you took your PPE gear off after solvent cleaning, please put it back on BEFORE priming.
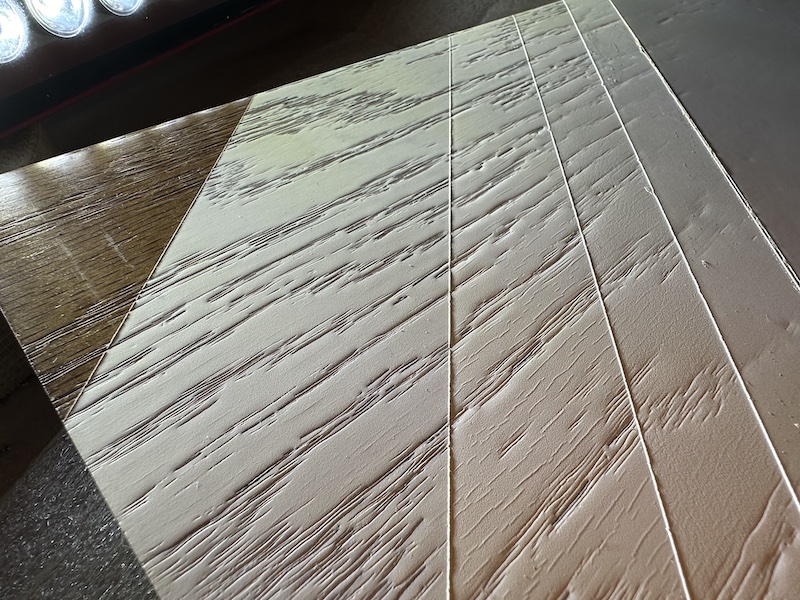
How to prime and paint oak cabinets, levels of priming
- Prime Wood To Seal It – Oak will require a minimum of 2 and, more often, 3 coats of primer for a proper seal. Getting the primer thick enough and evenly distributed takes quite a bit of practice. The wood needs to be completely sealed, without bridging gaps on the 5-panel door. A dental tool or small pick can be helpful for fixing any gaps that may accidentally be painted with primer. Some DIYers and painters will use a brush and roller to “force” paint into the pores to fill them. Just beware that the topcoat will amplify any brush and roller texture, so it must be sanded out completely. When trying for a smooth finish, more sanding is better than less. Typically priming is used to build “up” a surface, but with oak, the process is different. The futher down the primer is sanded, the better the additional coats are able to seal the oak. We prime 5-6 wet mils, which will be tough to achieve without drips if you don’t have years of practice. If you took your PPE gear off after solvent cleaning, please put it back on BEFORE priming.
-
- Sanding—Sanding must be done between all coats of primer. All wood pores must be filled to avoid tannin bleed and dye migration. Sanding the surface helps paint fill these gaps better and promote adhesion. Typically, 220 grit is used between coats of priming. A Festool or Surfprep Dustless Sanding System saves time and produces a better product than hand sanding. It is arguably the most important innovation in the woodworking industry in recent memory. Buy one and thank me later! (This is redundant, but use a dust mask or respirator if you don’t have a dustless sanding system. And use a dust mask even if you do).
-
- Topcoat – KCMA-rated products are your only real choice here. I prefer Milesi in a 20 sheen (satin in the Italian sheen system), but many manufacturers have stepped up with awesome products in recent years. Each one of these products has it’s own idiosyncrasies and will have a learning curve. Common issues are caused by poor ventilation in the shop, humidity, and temperature irregularities. Most of these products are considered passable with 1 heavy coat (4-6 wet mils), but we typically spray 2 coats. We like to spray with 50% or above relative humidity and temperatures around 70 degrees Fahrenheit. Other products that are KCMA-rated and work well include Envirolak 200 series, Renner 765 and 851, and ICRO topcoats (we are still new to this one and don’t have a favorite yet).
-
- Is A Sealer Necessary – A good KCMA-rated cabinet coating will not need a sealer. These topcoats should already be extremely durable, stain-resistant, and burnish-resistant for cleaning.
-
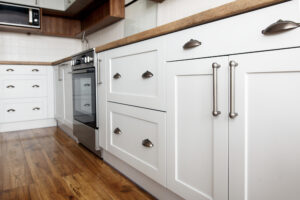
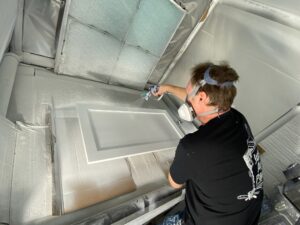
- What about the cabinet boxes – Same process as above, only lots of masking! (see photo for details).
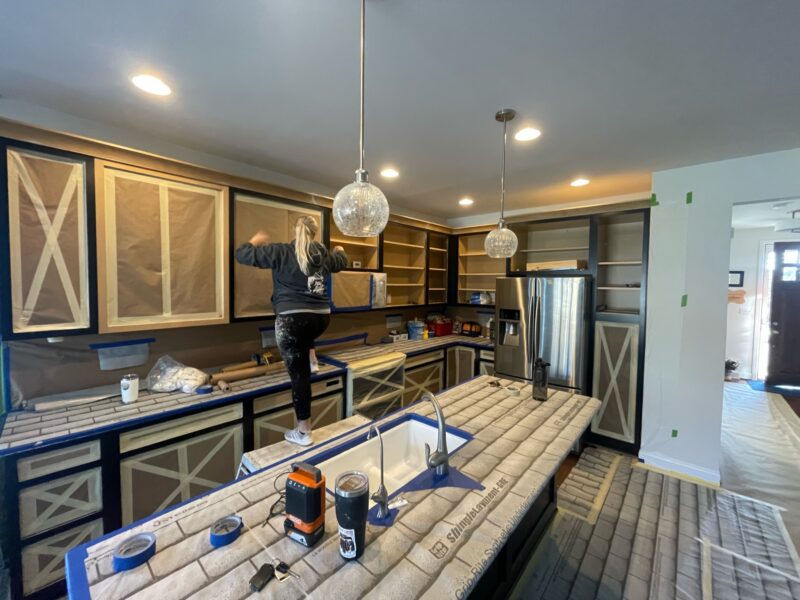
Prep for painting oak cabinets can literally take days.
- What about the cabinet boxes – Same process as above, only lots of masking! (see photo for details).
TO SUMMARIZE:
Oak cabinets are paintable, but they are much more difficult to paint than cabinets with less texture. The peaks and valleys in oak are hard to seal with a paint sprayer and also tend to trap grease, food, and waxy polishes. Tannins and dye from the wood can migrate into a topcoat without lots of practice in identifying problem areas. Lastly, oak moves quite a bit, so product choice is paramount. Shellac-based primer and vinyl sealer tend to not adhere as well as water-based primers.
If you plan to paint your own oak cabinets, proceed with caution. Try sample doors first. Slow and steady beats fast. Identify the best products available, typically NOT sold at box stores like Sherwin Willimas or Home Depot. Clean thoroughly with a degreaser and a solvent because grease and wax (and dinner) hide in the pores. Err on over-sanding. Prime heavier than you are comfortable, and invest in a mil gauge so you aren’t guessing on product thickness. Remember that cabinet primers and paints are more temperature and humidity-sensitive than regular house paints. Do NOT caulk 5-panel doors, and do NOT use a sealer on top of your KCMA-rated topcoat.
PRODUCTS WE LOVE (BONUS)
-
- Krud Kutter and Krud Kutter TSP substitute https://www.rustoleum.com/product-catalog/consumer-brands/krud-kutter
-
- Naphtha for a final solvent-based wipe
-
- Scott Brand lint-free blue shop towels
-
- TCP low-tac superior tack cloths
-
- Festool and Surfprep dustless sanders and HEPA VAC systems
-
- Surpprep squishy foam sanding pads (ALL varieties) https://surfprepsanding.com
-
- Festool and Surfprep inspection lights
-
- Canned air, any brand
-
- 8 piece dental too set
-
- Centurion and Envirolak water-based primers
-
- Milesi, Envirolak, and ICRO topcoats (1 or 2K)

